Full automation of development environment with docker-compose
In this article, we will share our experience in automating the launch,
testing, and configuration of large projects using docker-compose. A few simple
changes can help your team be more efficient and spend time on important, not
routine tasks.
Docker in
2017
At the Dockercon 2016 conference, the CEO of Docker said that the number
of applications that run in Docker has grown by 3100% over the past two years.
More than 460 thousand applications around the world are launched in Docker.
This is unbelievable!
Docker has completely changed the way we write applications and has become an integral part for developers and DevOps teams. In this article, we believe that you are already familiar with Docker and want to give you another good reason to continue using it.
What’s
wrong?
Since the beginning of my career, when I was developing web
applications, launching an application in a working environment has always been
a difficult task. I had to do a lot of extra work from installing the database
to configuring the application to just start it. Developers don’t like writing
documentation, and the steps to launching a project are usually hidden in the
heads of team members. As a result, the launch of the project becomes a painful
task, especially for new guys.
Many projects are simple at the start, but get bigger over time. This
leads to an increase in external dependencies, such as databases, queues. Due
to the growing popularity of microservices, many projects cease to be
monolithic and are divided into several small parts. Any such change requires
the attention of the entire team, since after such changes, the project needs
to be launched in a different way. Usually, developers involved in root changes
write a letter or create a wiki page with a description of the steps that need to
be taken so that the project starts again on working environments. Usually it
works, but not always 🙂 Once our team fell into a situation where a developer
from another continent made many changes to the project, wrote a long letter
and went to bed. I suppose you know what happened next. That’s right, he forgot
to mention a few important points. As a result, the next day, part of the team
simply could not start the project and the day was lost.
As an engineer, I like to automate everything around. I believe that
launch, testing and deployment should always be one-step. In this case, the
team will be able to focus on important tasks: developing and improving the
product. It was harder to do 10 years ago, but now it’s become much easier to
automate and, it seems to me, every team should devote time to this. The
earlier the better.
Quick
start with docker-compose
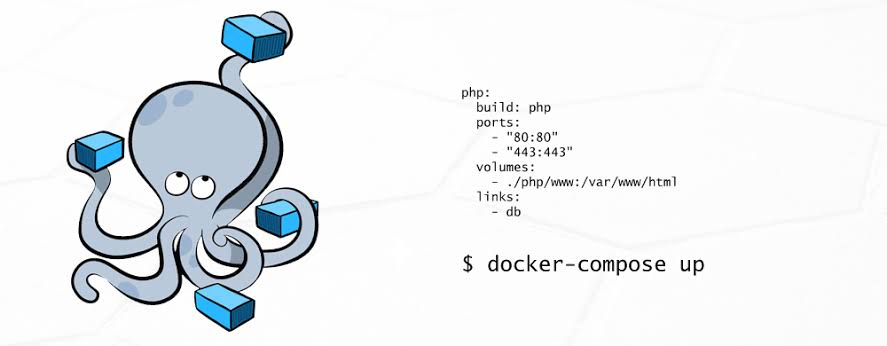
Docker-compose is a simple tool that allows you to configure and run
multiple containers with a single command. Before we dive deeper into
docker-compose, we need to dwell on the project structure. We use
“monorepo”. The code of each service (frontend, api, worker, etc) is
in its directory and has a Dockerfile.
The entire configuration for docker-compose is described in the docker-compose.yml file, which usually is at the root of the project. Let’s start by automating a simple Node.JS application that works with a MongoDB database. Here is what the configuration file will look like:
|
1 2 3 4 5 6 7 8 9 10 11 12 13 14 15 16 17 |
version: '2' services: web: build: context: ./web dockerfile: Dockerfile.dev volumes: - "./web/src:/web/src" ports: - "8080:8080" mongo: command: mongod image: mongo:3.2.0 ports: - "27100:27017" # map port to none standard port, to avoid conflicts with locally installed mongodb. volumes: - /var/run/docker.sock:/var/run/docker.sock |
To start the project, we need one command:
|
1 |
$ docker-compose up |
At the first start, all containers will be built or downloaded. If you
worked with Docker, the configuration file for docker-compose should be more or
less clear, but you should pay attention to a few details:
- context: ./web – this
indicates the path to the docker service file inside our repository. - dockerfile:
Dockerfile.dev – we use a separate Dockerfile.dev for working environments. For
“production” environments, we copy the code into the Docker image,
and on production environments we add the code as “volume”. When
using “volume”, you don’t have to restart docker-compose every time
after changes in the code. - volumes: –
“./web/src:/web/src” – this is how the code is added as
“volume” in Docker. - Docker-compose
automatically binds containers. Because of this, it is possible to access the service by
name. For example, from the web service you can connect to the database
MongoDB: mongodb: // mongo: 27017
Always
use –build
By default, docker-compose up will not rebuild containers if they are
already on the host. To make docker do this, use the –build argument. This is
usually needed when third-party project dependencies change or the dockerfile
changes. In our team, we always use docker-compose up –build. Docker can cache
layers and will not rebuild the container if nothing has changed. When using
–build all over the place, you might lose a few seconds when you start the
application. But, at the same time, you will never encounter magical problems
of launching a new version of an application with old dependencies.
Tip: You can wrap the project launch command in a
simple bash script:
|
1 2 |
#!/bin/sh docker-compose up --build "$@" |
This will give you the opportunity to change the arguments or approach
for launching the application as a whole. For a team, it will always be just
like: ./bin/start.sh.
Partial
launch
In this docker-compose.yml example, some services are interdependent:
|
1 2 3 4 5 6 7 8 9 10 |
api: build: context: ./api dockerfile: Dockerfile.dev volumes: - "./api/src:/app/src" ports: - "8081:8081" depends_on: - mongo |
In this case, the api service needs a database to work. When launching
docker-compose, you can pass the name of the service in order to run only it
and all its dependencies: docker-compose up api. This command will launch
MongoDB and only then will it launch api.
In large projects, there are always parts that are only needed from time
to time. Different team members can work on different parts of the application.
For the frontend developer who works on the landing page, there is no need to
run the entire project. He can just run only the parts that he really needs.
>
/ dev / null annoying logs
Often we use tools that generate a lot of logs, thereby distracting us
from the useful logs of our application. To disable logs for a specific
service, you just need to set the logging driver to none.
|
1 2 3 4 5 6 7 8 9 |
mongo: command: mongod image: mongo:3.2.0 ports: - "27100:27017" volumes: - /var/run/docker.sock:/var/run/docker.sock logging: driver: none |
Multiple
docker-compose files
By default, when you run docker-compose up, docker-compose looks for the
docker-compose.yml configuration file in the current directory. In some cases
(let’s talk about this in a minute), you will have to create several such
configuration files. To do this, you simply use the –file argument:
|
1 |
docker-compose --file docker-compose.local-tests.yml up |
So why might you need several configuration files? The first use case is
to split a large project into several smaller ones. Interestingly, even if you
run several separate docker-compose, services will still be able to communicate
with each other by name from docker-compose. For example, you can separate
infrastructure containers (databases, queues, etc.) and application containers
into separate docker-compose files.
Running
tests
Our tests include various types: unit, integration, UI testing, code
syntax checking. Each service has its own set of tests. Integration and UI
tests require api and web frontend to work.
At the very beginning, it seemed to us that we should run tests every
time docker-compose starts. But very soon we realized that it was not always
convenient and took too much time. In some cases, we also wanted to have a
little more control over which tests to run. To do this, we use a separate
configuration docker-compose file:
|
1 2 3 4 5 6 7 8 9 10 11 12 |
version: '2' services: api-tests: image: app_api command: npm run test volumes: - "./api/src:/app/src" web-tests: image: app_web command: npm run test volumes: - "./web/src:/app/src" |
To run the tests, the main docker-compose must be running. Integration
tests use the working version of the api service, and UI tests use the web
frontend service. Essentially, the tests simply use images that are compiled
mainly by docker-compose. It is also possible to run tests only for a specific
service, for example:
|
1 |
docker-compose --file docker-compose.local-tests.yml up api-tests |
This command will only run tests for the api service.
Container
prefix
By default, all containers that run using docker-compose use the name of
the current directory as a prefix. The name of this directory may differ in the
working environments of different developers. This prefix (app_) is used when
we want to reference the container from the main docker-compose file. To fix
this prefix, you need to create the .env file next to the docker-compose
configuration files in the directory from which docker-compose is launched:
|
1 |
COMPOSE_PROJECT_NAME=app |
Thus, the prefix will be the same in all work environments.
Conclusion
Docker-compose is a very useful and flexible way to automate the launch
of projects.
When new developers are added to our team, we give them a small task,
which they must complete by the end of the first working day. Everyone who
joined our team dealt with this and was the happiest person on Earth. From the
very first minutes, new developers can focus on important tasks and not waste
time on starting a project. Our documentation for starting a project consists
of three points:
- Install Docker and
Docker-compose - Clone Repository
- Run in terminal
./bin/start.sh
We hope that the article was useful and will help make your project
better 🙂